
Single-use plastic is everywhere. It clogs landfills, pollutes oceans, and wraps your lunch for a few hours before heading straight to the trash. Beeswax wraps are a smarter, cleaner alternative. They keep food fresh, cut down waste, and actually look good doing it.
You don’t need to buy fancy wraps to make the switch. With a few simple materials and a bit of heat, you can craft your own beeswax wraps at home. They are fun to make, last for months, and make your fridge look a whole lot cooler.
What Are Beeswax Wraps?
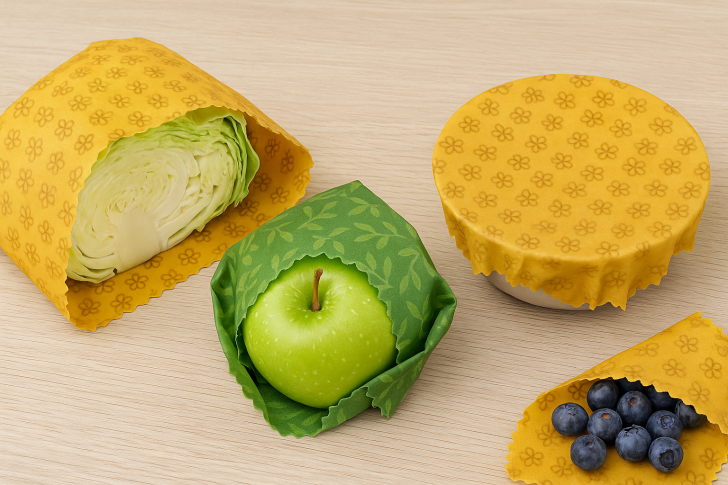
Beeswax wraps are pieces of cotton fabric coated in a waxy mix. They are bendy, grippy, and mold to bowls, fruits, sandwiches - you name it. They work just like plastic wrap, except they are reusable, washable, and compostable.
FrontStory / Beeswax creates a breathable, waterproof layer. Pine rosin gives the wrap that sticky “cling.” Jojoba oil keeps it soft and stops it from cracking.
Together, they make a food wrap that is tough, flexible, and zero-waste.
The Stuff You Will Need
Start with 100% cotton. Look for something lightweight with a tight weave, like quilting cotton or an old pillowcase. Wash it first to strip off any coatings or residues that block wax from sticking.
You will also need beeswax pellets or grated blocks, pine rosin (the sticky part), and jojoba oil. You can sometimes swap jojoba oil for coconut oil, but jojoba holds up better over time and doesn’t go rancid.
The Best Way to Make Beeswax Wraps at Home
The oven method is, hands down, the easiest and most foolproof. Preheat your oven to approximately 200°F (about 93 °C). You want it low—just enough to melt the wax without burning the fabric.
Cut your fabric to size. Sandwich wrap? About 10x10 inches. Covering a bowl? Go bigger. Use pinking shears, if available, to prevent the edges from fraying. Lay your fabric flat on a baking sheet lined with parchment paper.
If you are using just beeswax, sprinkle the pellets evenly across the fabric. For a full blend, melt the beeswax, rosin, and jojoba oil in a double boiler first, then brush it on. Slide the tray into the oven and wait a few minutes.
The wax should melt quickly and soak into the cloth. Pull it out, spread the wax evenly with a clean brush, and hang the wrap to dry.
Iron It Out!
No oven? No problem. The iron method works great. Lay down parchment paper, place your fabric on top, sprinkle the wax mix, cover with another sheet of parchment, then press with a hot iron. The wax melts and spreads fast. Just be sure to protect your iron from getting waxy. Use foil as a barrier if needed.
FrontStory / A good starting point is four parts beeswax, one part rosin, and one part oil by weight. Tweak as needed.
Too stiff? Add more oil. Not sticky enough? Boost the rosin. Keep notes so you can dial in the perfect texture next time.
It helps to test on a small scrap first. Don’t guess. Some combos turn out too dry or too gooey. A balanced wrap should feel slightly tacky, flexible, and smooth, not greasy or brittle.
Keep Expectations in Check
Beeswax wraps are awesome, but they are not magic. Avoid using them for raw meat, hot food, or anything extremely greasy. The wax will melt or pick up smells you don’t want in your next snack.
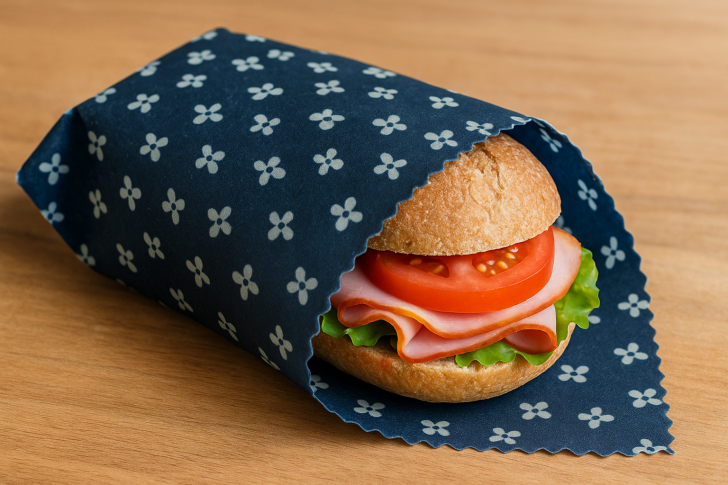
That said, they are great for sandwiches, half-cut fruits, cheese, or covering jars. They are not as airtight as plastic, but they allow food to breathe, which actually helps certain items last longer, especially herbs and produce.